💰Spring Renewal & Women’s Day Promotion – 8% OFF Limited Time
🌸With the arrival of spring, our company has officially resumed full operation and production capacity after the Spring Festival holiday. We sincerely thank all customers for your patience and support.
To honor International Women’s Day and thank you for your trust, we are launching a limited-time special promotion:
⏰ Promotion Time March 5 – March 31
🎯 Exclusive Discount 8% OFF Coupon for all orders placed during the valid period.
💡 Warm Tips Place your order early to enjoy priority production and guaranteed delivery time.
This event is dedicated to celebrating the power of women worldwide and thanking you for your continued partnership.
For any inquiries, please contact our sales team.
Thank you for choosing us, and let’s move forward to a prosperous new year together!
Discover everything you need to know about electroplating 3D printed parts – from how it works to its benefits, challenges, and industrial applications. Upgrade your prints with real metal strength and finish.
🌟Content in this article
询问 ChatGPT
Electroplating 3D Printed Parts: The Ultimate Guide to Metalizing Your Prints
What Is Electroplating and Why It Matters for 3D Printing
Electroplating is a metal finishing process that coats an object with a thin layer of metal using electricity. Commonly used to enhance appearance, durability, and conductivity, this technique is now being paired with 3D printing to give plastic parts a metallic surface finish—without the cost of full metal 3D printing.
Whether you’re making jewelry, engineering prototypes, props, or antenna components, electroplating 3D prints offers a game-changing way to combine the flexibility of additive manufacturing with the strength and appearance of metal.
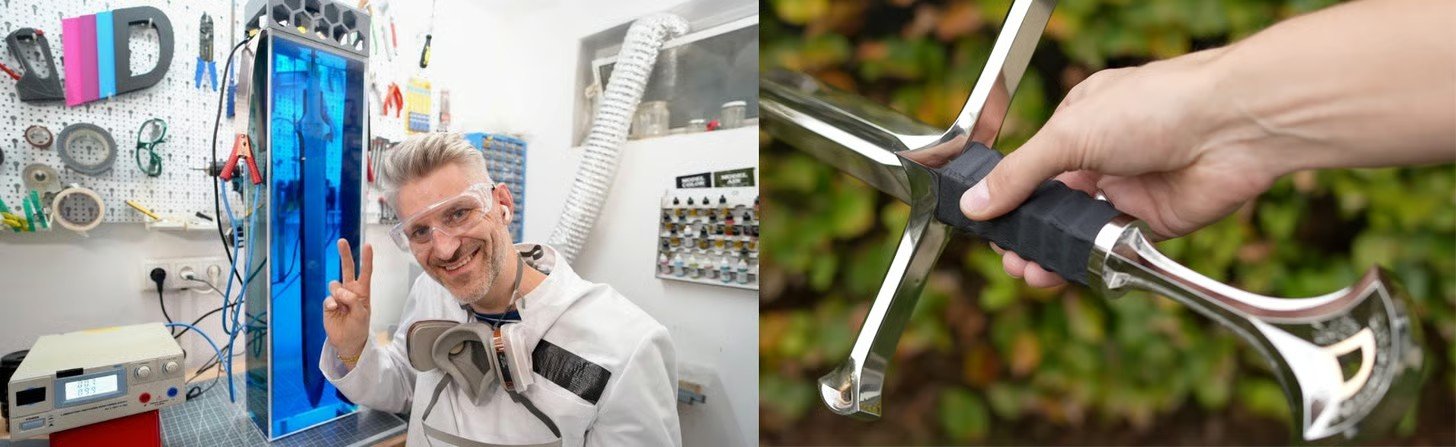
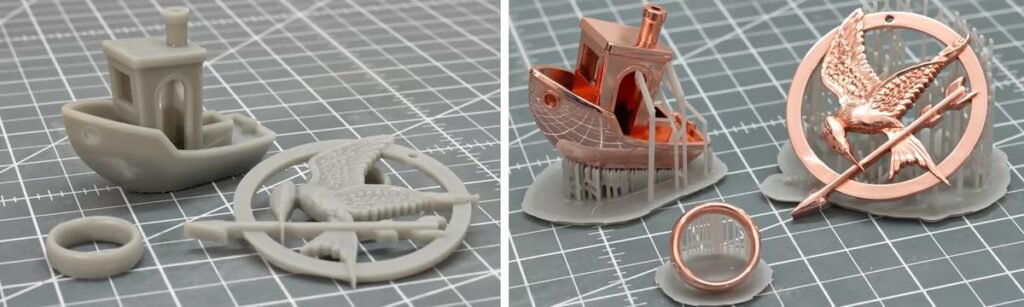
These 3D printed parts were sanded, sprayed with graphite, polished, electroplated with copper, and polished again to a mirror finish (Source: Hen3drik aka Hendrik Vogelpohl via YouTube)
How Electroplating Works
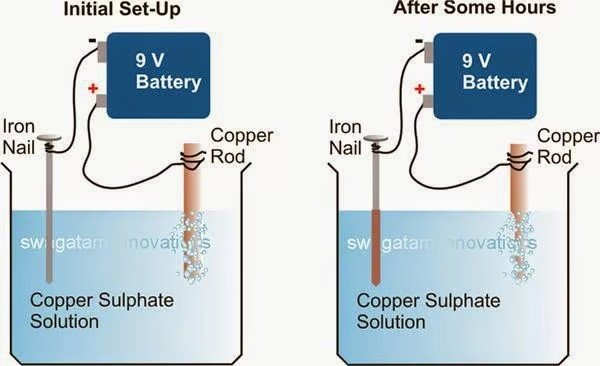
Electroplating uses electrolysis to transfer metal ions from a donor material (anode) to the object being plated (cathode). When placed in a conductive electrolyte solution and subjected to electrical current, metal particles are deposited onto the surface of your part.
✅ Fun Fact: Even NASA is exploring electroplating to improve the mechanical properties of lightweight 3D printed parts for space applications.
A rudimentary setup explaining the electroplating principle (Source: Rapid Direct)
Common Metals Used in Electroplating:
· Copper
· Nickel
· Gold
· Silver
· Chromium
· Tin
· Palladium
· Zinc
Why Electroplate 3D Printed Parts?
Plastic 3D printed parts (especially SLA and FDM prints) are lightweight and affordable, but they often lack structural integrity and visual appeal. Electroplating bridges that gap by offering:
✔️ Improved Aesthetics
Get a high-end metallic finish that mimics real metal.
✔️ Enhanced Durability
Increase tensile strength, stiffness, and wear resistance.
✔️ Conductivity
Make non-conductive plastics usable in electronic or RF applications.
✔️ Cost-Efficiency
Get metal-like performance at a fraction of the cost of metal 3D printing.
Cardacino’s 6-foot art sculpture titled “The Emptiness of Shark” shows that electroplating works well on large-scale objects (Source: Michael Cardacino)
The Electroplating Process Step-by-Step
3D Print the Part
Choose a printing method with smooth surface finish—SLA or resin-based printers are preferred. FDM is usable but will require more post-processing.
Sand and Smooth the Surface
Remove layer lines and imperfections. A smooth surface ensures better adhesion and a mirror-like finish.
Clean the Part Thoroughly
Degrease and rinse the part between each step. Dust and oil are major enemies of electroplating.
Make the Part Conductive
Apply graphite spray, copper paint, or nickel paint to allow electricity to flow through the part.
Set Up the Electroplating Circuit
Connect your part (cathode) and the metal source (anode) to a power supply, and immerse everything in the electrolyte solution.
Start Electroplating
Adjust the current based on the surface area and desired coating thickness. Low current = thin coat, high current = faster but riskier plating.
Polish or Re-Plate
Post-process the part for shine or apply additional metal layers (nickel, gold, etc.) for enhanced performance or appearance.
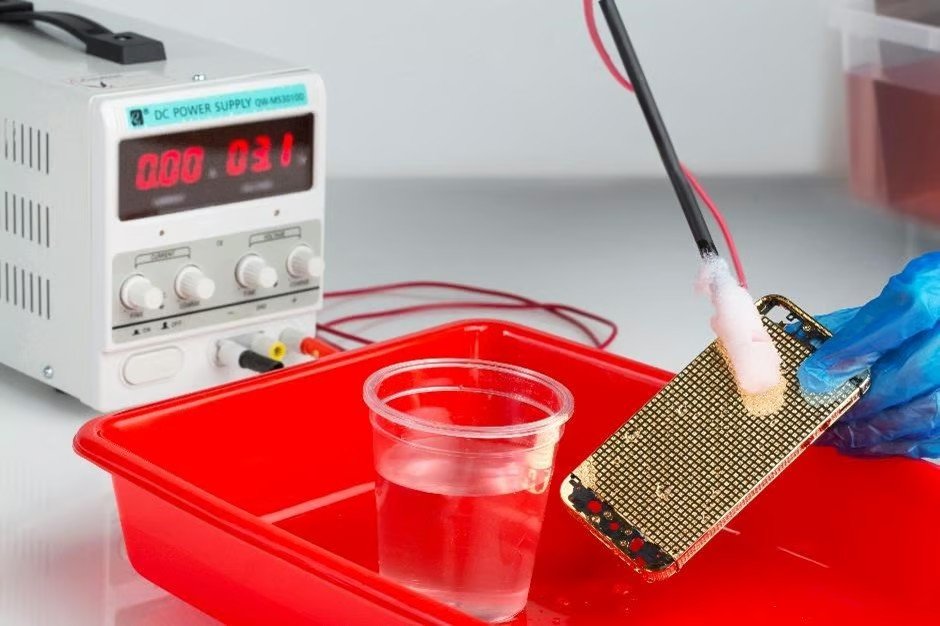
Brush plating uses the same principle as tank plating but uses a brush as an anode to apply the coating (Source: Gold Solution Plating)
Electroplating Methods
There are three main types of tank plating:
Barrel Plating: For mass production of small parts
Rack Plating: Best for delicate or large objects
Reel-to-Reel Plating: Efficient for continuous parts (e.g., wires, foil)
For hobbyists, rack plating is the most accessible DIY method.
Safety Tips & Environmental Care
Wear PPE: Gloves, goggles, respirator mask
Work in Ventilated Areas
Never Pour Electrolyte Down the Drain
Dispose of Chemicals Properly
Electroplating solutions can contain hazardous materials like sulfuric acid and heavy metal salts. Always handle with care.
Troubleshooting Common Electroplating Issues
Problem
Cause
Solution
Uneven Coating
Too much or too little current
Adjust voltage, reposition part regularly
Poor Adhesion
Dirty surface or incompatible materials
Re-clean and test different paints
Dull Finish
Old electrolyte, wrong temp, or chemical imbalance
Replace solution or add brightener
Cracks or Peeling
Thermal expansion mismatch
Plate in thinner layers or switch materials
Bubbles or Roughness
Overcurrent or poor mixing
Reduce current, stir solution gently
Applications of Electroplating in 3D Printing
Electroplating is used across industries, including:
Automotive: Restoration of classic car parts, concept components
Aerospace: Lightweight, strong parts for testing
Electronics: Conductive housings, RF antennas
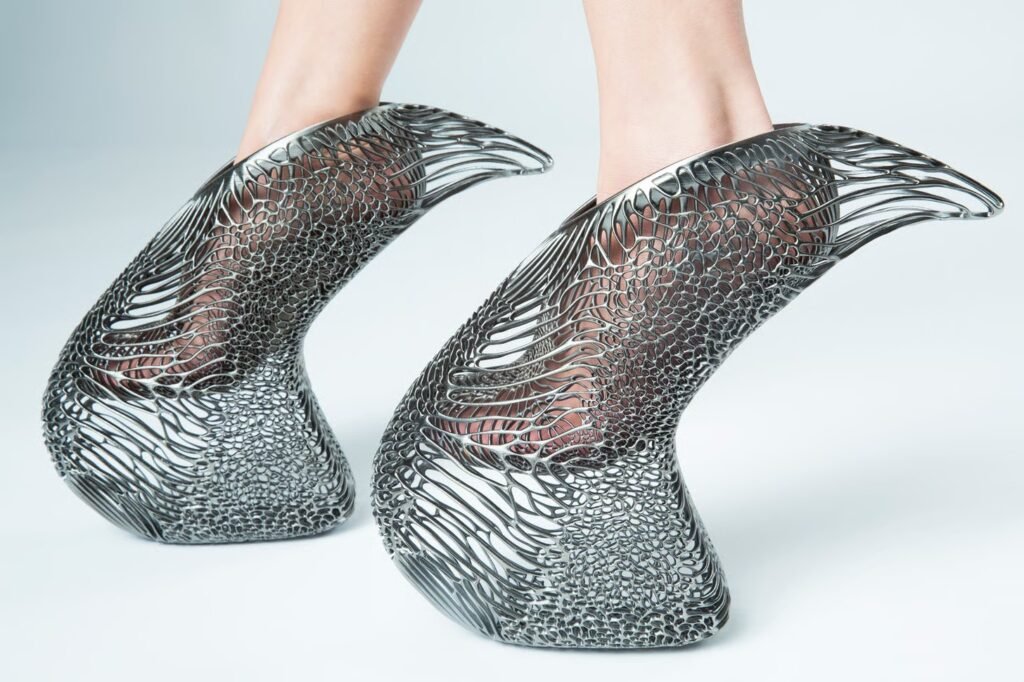
Fashion & Art: Jewelry, footwear, large sculptures
Medical Devices: Electroplated tools and components
🧠 Example: Fashion brand Ica & Kostika used 3D printing and electroplating to produce their stunning Mycelium Shoe, layered with copper, nickel, and chrome.
Shoe brand Ica & Kostika SLS 3D printed and electroplated their Mycelium Shoe with copper, nickel, and chromium (Source: Ica & Kostika)
Pros and Cons of Electroplating 3D Prints
✅ Pros
·Enhances visual and tactile quality
·Increases mechanical performance
·Cost-effective vs. metal printing
·Usable on SLA, FDM, and SLS prints
·Great for prototyping and functional testing
⚠️ Cons
·Involves toxic chemicals and safety risks
·Not beginner-friendly without practice
·Surface prep is time-consuming
·Performance still inferior to solid metal parts
·Time-intensive for complex coatings
Conclusion
Electroplating 3D printed parts is a powerful, cost-effective technique to enhance your designs with real metal functionality and finish. Whether you’re prototyping, producing, or simply experimenting, mastering this process unlocks a world of creative and industrial possibilities.
Ready to upgrade your prints? Start small, stay safe, and explore the stunning results that metal-plated plastic can achieve.
The Aachen-based Fraunhofer Institute for Laser Technology (Fraunhofer ILT) is to research titanium aluminide hydrogen reactors and heat exchangers. The
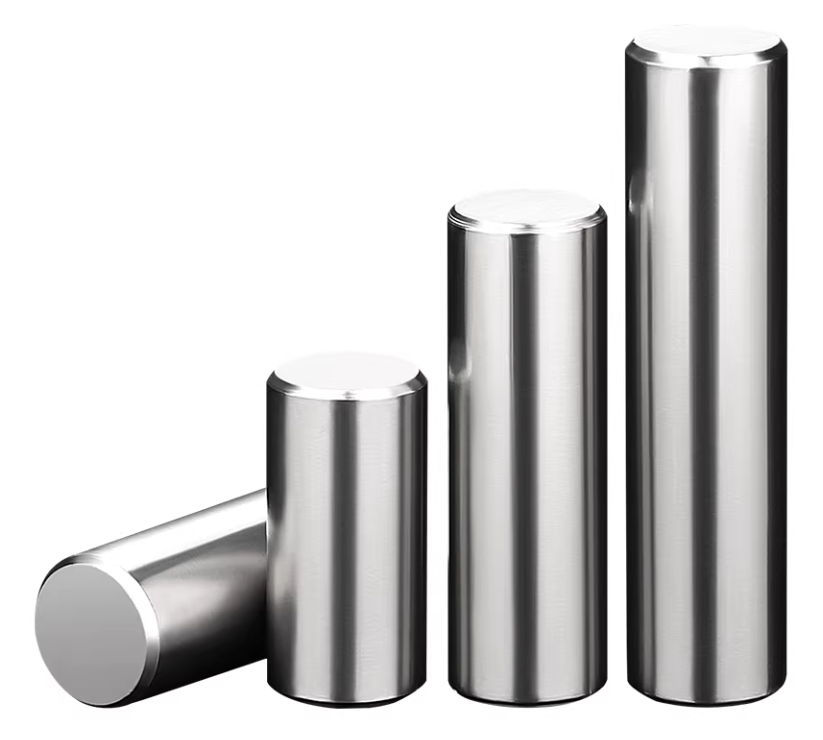
Step into a modern kitchen, open a refrigerator, walk into an office building elevator, or observe medical equipment—in these seemingly different scenarios, one material silently underpins our lives: Stainless Steel 304. As the most common and widely used grade of austenitic stainless steel, SS304 has become an “invisible champion” in industrial manufacturing and daily life, thanks to its excellent corrosion resistance, good formability, and outstanding hygienic properties.
Since stainless steel was invented in the early 20th century, 304 stainless steel has evolved into the world’s most popular stainless steel variety, accounting for approximately 50% of the stainless steel market share. From aerospace to food processing, from architectural decoration to medical devices, this alloy occupies an irreplaceable position in modern materials science due to its unique combination of properties. This article will provide a comprehensive analysis of the chemical composition, mechanical properties, application fields, processing techniques, and selection guidelines for 304 stainless steel, offering a thorough reference for engineers, designers, purchasers, and general consumers.
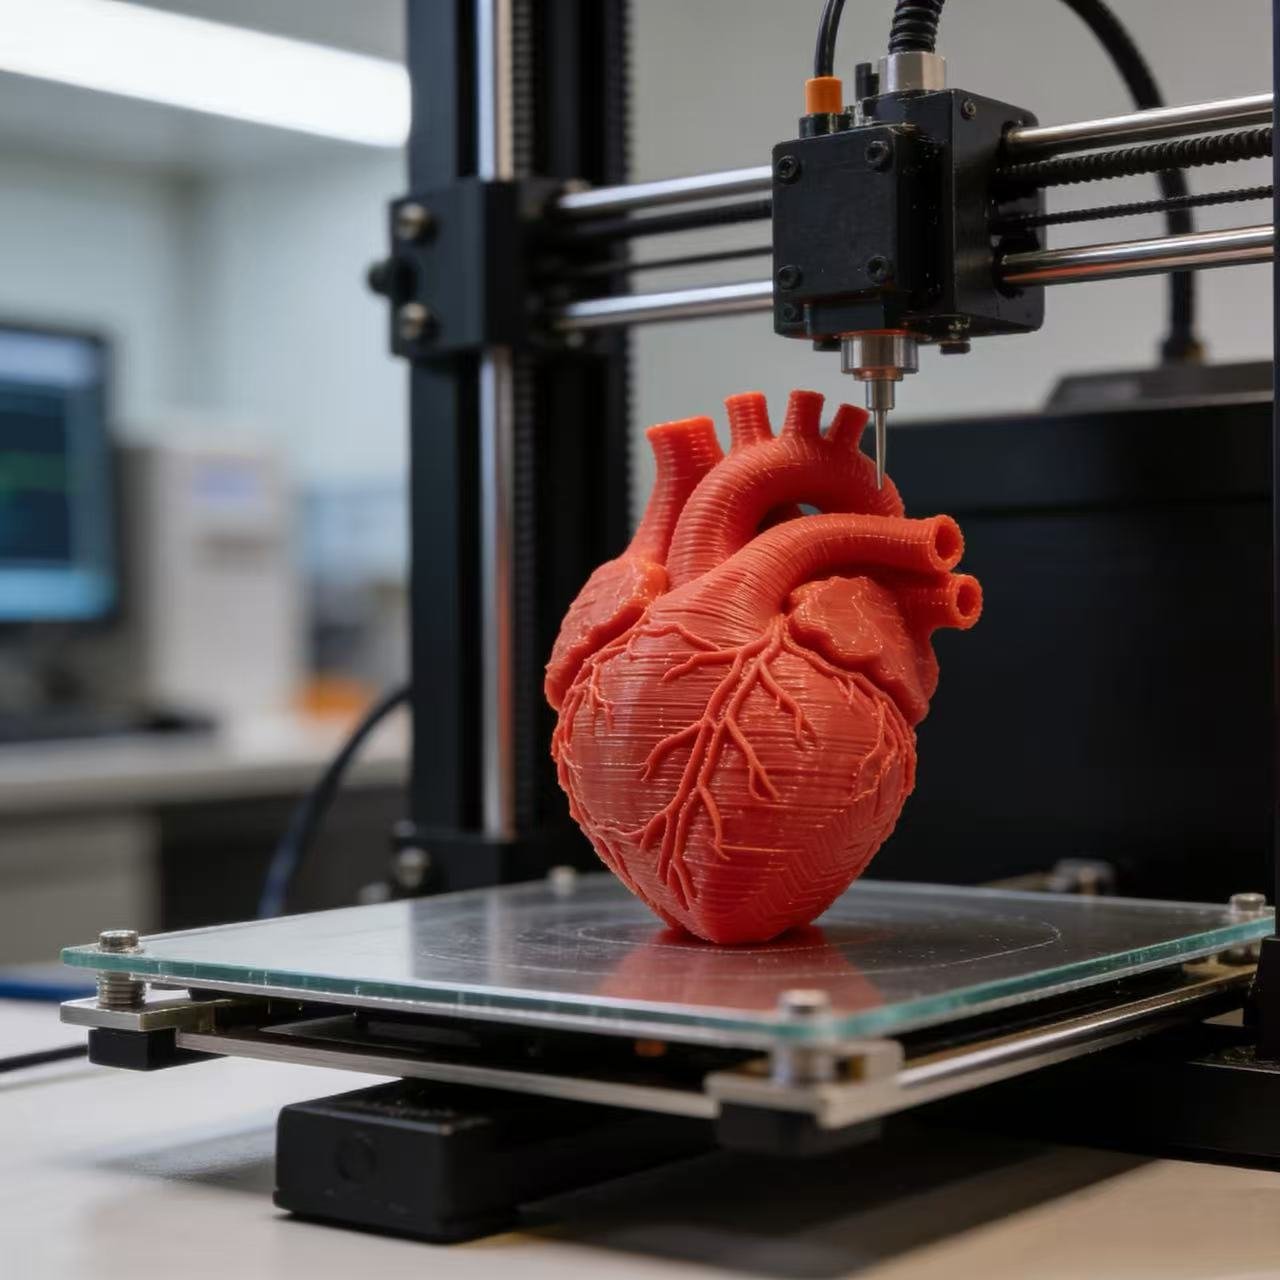
In the high-stakes world of pediatric cardiology, surgeons often operate with limited information, navigating tiny, complex, and uniquely malformed hearts.